I have a few posts in the works, but personal matters have kept me too busy to invest the time they deserve. So I wanted to add a quick story for the few people that follow my blog.
My first hack happened in 8th grade, back in the late 90s. The computer lab at the school had just switched from a mainframe networked to workstations, to a LAN with Gateway 2000 PCs Windows 95. It was the school’s first computer lab with internet access, and the teachers were given email addresses. A few teachers proudly tacked them to the bulletin board on the wall at the front of the lab for everyone to see.
We had a new computer lab teacher, fresh out of college. She was genuinely nice and seemed very excited to be there.
The teacher explained that these machines had a program called “Deep Freeze” which prevented access to anything other than the shortcuts on the desktop, by locking out the Start Menu and prevented right clicking on the desktop icons and taskbar. The teachers were confident that the only abuse these computers could suffer was physical, such as gum in the keyboard.
Put yourself in my shoes for a moment. Imagine being a middle schooler in the 90’s who had watched the movie “Hackers” way too many times. The internet was like magic, and hackers were wizards wielding that magic. This middleschool wannabe hacker got excited by the restrictions the teacher was describing, and saw it as a challenge.
Before this, I had read a collection of text files called “The Happy Hackers Guide to Mostly Harmless Hacking.” It can now be found on textfiles.com. I knew becoming a hacker didn’t happen over night, and that I needed to crawl before I could run. From those texts I learned to use Telnet, and had a habit of scanning for ports on a server and using telnet on each port to see what would happen.
I sat in the computer lab with the rest of my class, opened Word, and rushed through our assignment. It was a tutorial on how to use Copy, Cut, and Paste, and how to open and save a Word document. The final instructions said to save the document when we were finished. I click “Save As” which opened to root directory (or C:\ Folder) and had an interesting thought…
I quickly saved my document to the Desktop, and clicked “Save As” again. I had never heard of Deep Freeze before that day, but I was already noticing a potential vulnerability. I changed the file type from “Documents” to “All Files” and started exploring directories within the Save As window. I made it to C:\Windows and decided to test it. I right clicked on mspaint.exe and selected “Open”. To my surprise, the Paint application opened on my screen. I closed it and grinned.
I found and opened Telnet.exe. “What should I do now?“ I thought, with no real plan in mind. The classmate beside me had taken notice and asked, “How did you open that?” While giving him the quick run down, I noticed the teacher’s email addresses on the bulletin board at the front of the room.
I already knew that nearby Virginia Tech had an SMTP server that would allow anonymous emails to be sent, and the address was easy to remember, smtp.vt.edu port 25. I decided to play a little prank. I opened a connection in telnet to VT and did the usual HELO commands with a fake sender address, and started composing an email to one of my teachers.
Before I could finish typing the message, I felt a hand in my shoulder. I turned to the guy beside me, who was frantically trying to close Nike.com in Netscape Navigator, and then looked up to see the computer lab teacher staring straight at me with a panicked look. She said “close everything and come with me…”
I followed her out of the classroom into the hall, and she closed the door behind us. In a panicked voice she said “(My name).. I’m getting calls from the school board telling me something is up. I don’t know what your doing, but you need to stop right this minute, or you will face suspension! Do you understand!?” I looked down and nodded, and we walked back into the lab.
I entered the classroom and realized the room had turned silent and my classmates were all staring at me, some were trying not to laugh. The lab teacher darted back to her desk and grabbed the phone that had been left on hold. Apparently the teacher had talked loud enough in the hallway for everyone inside to hear. I wasn’t the type of person to show off to everyone, and rarely got in trouble. I didn’t know whether to be proud or embarrassed.
Rumors spread fast in middle school, and despite my attempt so far to keep a low profile, many people were already calling me a hacker. Explaining what actually happened didn’t help things, and for a few days I was known as the kid that hacked Virginia Tech from the Middle School’s computer lab.
What do I mean by blind upgrade? I’m going to upgrade to Big Sur without any prior knowledge, or reading any reviews.
If you didn’t already know, I was an ACMT (Apple Certified Macintosh Technician) for 6 years. I mostly performed repairs on Mac laptops (MacBook Pro, MacBook Air, MacBook) due to an overwhelming amount of college students in the area that used Mac. I also worked on iMacs and MacMini, performed data recovery, and fixed OS and filesystem related issue. I had never owned a Mac computer, and briefly used one at school, before I was asked to take on that role, but I grew very fond of them in time.
A few things I specifically like about Macs: macOS is free You can install macOS on an external hard drive and boot it on any compatible Mac You can clone your HDD to an external, and boot it off any compatible Mac You can connect a Thunderbolt/Thunderbolt 3 to another mac and boot off it’s internal HDD You can dual boot (bootcamp) to Windows or Linux. HDD encrypted by default
When I started seeing some of the buzz words being used about macOS 11, I became concerned. This is the first major macOS update that has occurred since I was a technician, so I had an idea…
I’m going to install and review a major OS update, without reading any of the reviews or opinions in advance.
This will result in a true review, going in blind with very few expectations. Expectations, be they good or bad, from other blogs, vlogs, and news sites. This is the first major OS version update released since I was a technician, and in the past, I was always very prepared for the issues I would see, and ready with fixes.
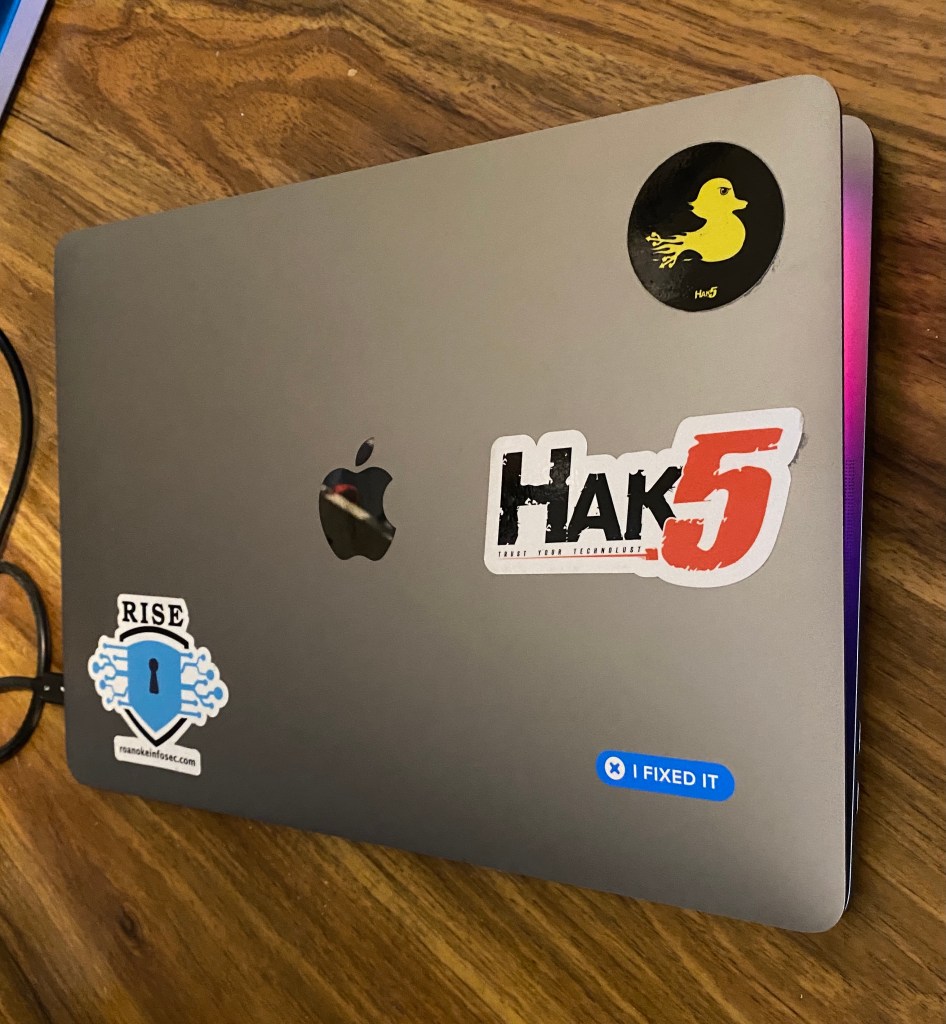
My 13″ MacBook Pro 2016
I’m going to be using my newest MacBook Pro (I have a few). Here are the specs/details MacBook Pro 13″ 2016, four Thunderbolt 3 Ports (has touch ID) Processor: 2.9 GHz Dual Core i5 Memory: 8GB 2133MHz LPDDR3 Graphics: Intel Iris 550 1536MB 250GB SSD Model: MacBookPro13,2
Here is a list that worry me about this update: Still UNIX based? App updates (require repurchase?) Dualboot (bootcamp) work? Disk Utility still work? Is it worth the effort?
Like any responsible computer user does, I created a backup. (sarcasm) And now we’re ready to upgrade…
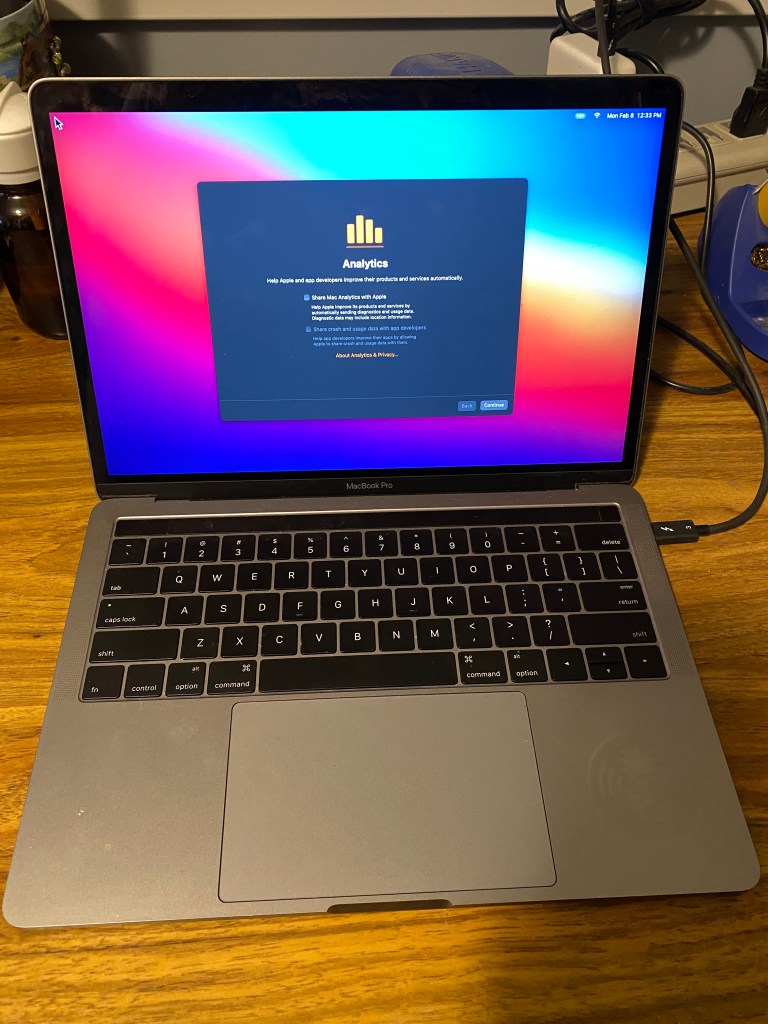
The upgrade itself happened much quicker than I expected. I make sure all the analytics stuff is unchecked.
^ Proof
The first and most obvious thing I noticed is that the visuals are a little different. Icons and Menus have a cleaner look and seem a little more spaced apart. So far, I prefer the new look. Back around macOS 10.8, Icons had become to detailed that it was sometimes hard to tell them apart.
Btw, This is dark mode.
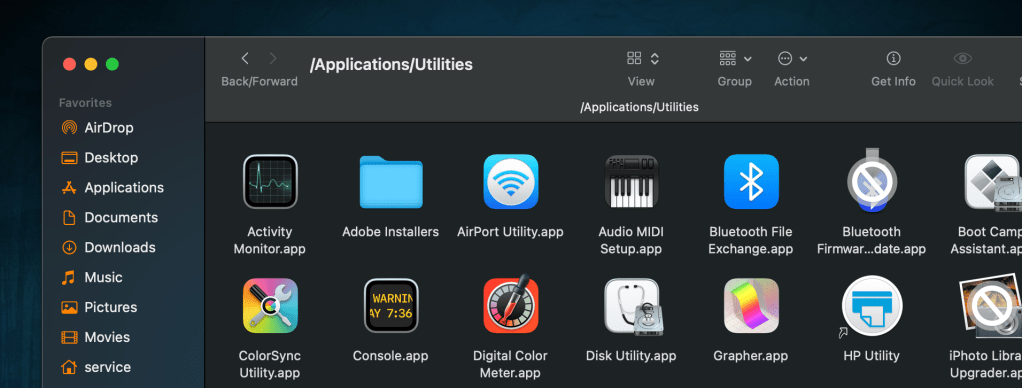
The two icons I’ve found with a prohibitory sign (circle with a slash through it, like a no parking sign) are shown above. One was the iPhoto Library Upgrader, which is only for upgrading a library from iPhoto to Photos, and is no longer needed, as well as a Bluetooth Firmware update. I honestly don’t remember what that was for.
I’m impressed by how quickly apps open. The only exception is Firefox, which is unchanged in how quickly it opens. By the way, I’ve switched to the same MacBook Pro to complete the remainder of this post.
I have not yet found any third party app that doesn’t work. Several needed to be updated, but updates were very quick. Again, I’m very impressed with how quick everything is. So far I’m seeing no problems with Brew, Tor, iHex, What’s Your Sign (adds hex values to right click menu), and so on.
I will need to do a separate section for the last part of this review, which is booting to Windows and Linux. Neither was installed on this Mac, due to the SSD being only 250GB. In the passed, I used a loader like rEFIt or equivalent.
For now, macOS has exceeded my expectations and, for the first time ever, I’m not disappointed with anything in this upgrade… so far.
UPDATE I wanted to include that Docker works on this ver of macOS, and UNIX shells still appear to be available, however I have no been able to find a version of Wine that works on macOS Catalina or later.
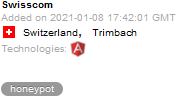
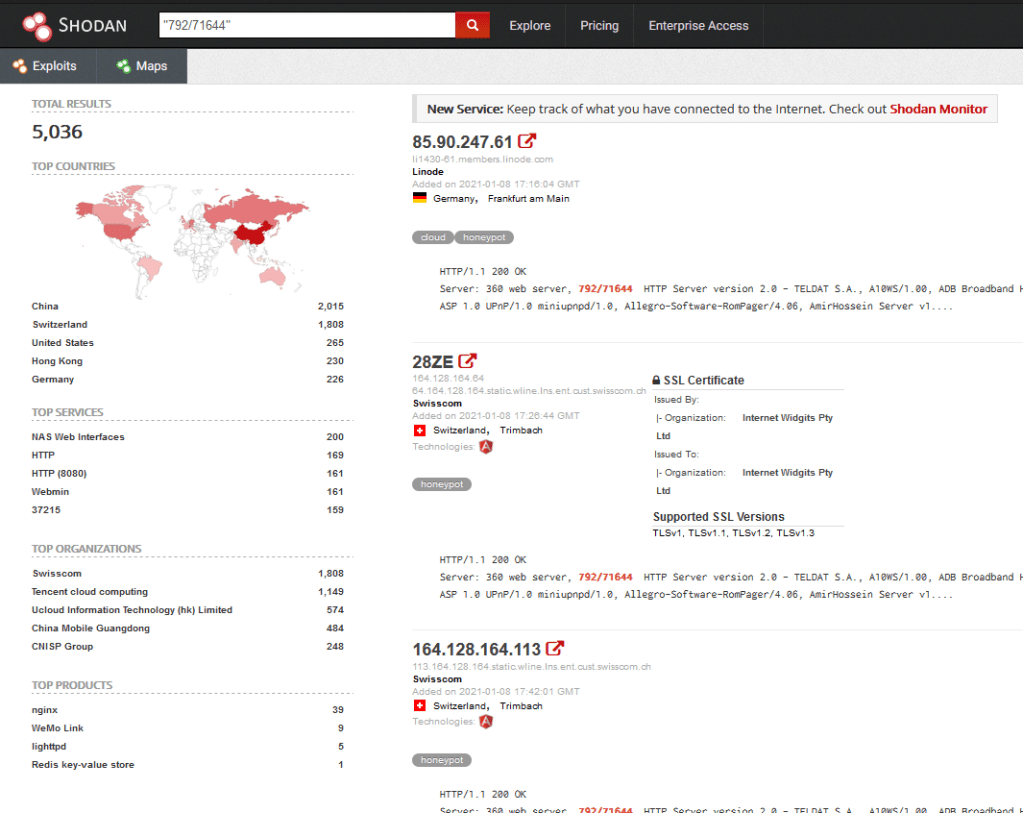
I used Shodan a lot when it was first introduced, and I’ve learned a lot about banners and services by using it. A few months ago I noticed a lot of searches were returning honeypots, which end up being false positives for my search. Shodan now labels honeypot results in the search, but previously I identified them as having 10-20 ports open and a long list of vulnerabilities associated with the results.
Honeypot tag in shodan Search
Below is a tag I’ve started adding to my searches if I begin seeing honeypots
-"792/71644"
On the other hand, it can also be used to search specifically for honeypots by removing the “-“
A search of “792/1644” in Shodan
The search returned 5.036 results. Not all results are Honeypots, because this number was added to help lure attackers. I haven’t taken the time to find out what technology this part of the banner came from, but I will update this post as that information comes to light. It’s also likely that Shodan has a search tag that will allow you to filter out anything tagged as a honeypot, but I haven’t yet explored that possibility.
SDR, or Software Defined Radio is the use of software instead of hardware in the radio world. Believe it or not, radio is still a common communications medium. It’s still used by Police, Fire, and Rescue on a regular basis. There are still amateur radio enthusiast communicating over long distances, CB radios over shorter distances, and signals continue to be sent from satellites in space. Our computers and cell phones continue to use it for wireless connections over WIFI, Bluetooth, Zigbee, LTE, and many other protocols. A lot of the older technology is still in use, and newer types of technology get added regularly. There is a huge spectrum of SDR to explore, but this post will focus mostly on the basics, and act as an introduction to the subject.
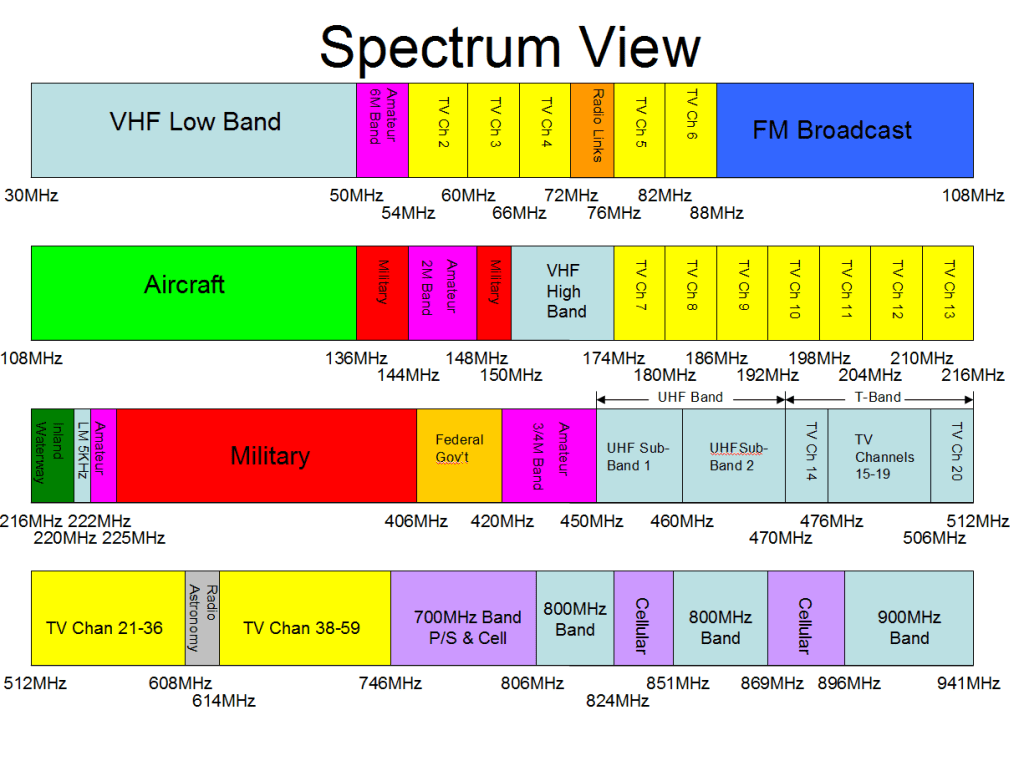
Before you start exploring SDR, you need to know a little about radio frequencies. Most people understand the basics, like FM radio between 87Mhz-108Mhz. FM is a good starting point in SDR because you can use a local radio station to verify that your SDR device and antenna are working. When you turn on the FM Radio in your car, the numbers on the screen are literally the frequency of the station. If you listen to Hot97 in NYC, your turning to 97.1MHz. The nice thing about SDR is that we can listen way above or below that range of frequencies. Moving up passed 108MHz puts you into a range that Aircraft use to communicate.
Interesting fact, many old home radios from the WW2 era had a knob to switch between AM, FM, and aircraft.
VHF and UHF bands
The image above is outdated, but gives a good overview of what’s what on different frequencies. Two ranges you might notice are missing from this diagram are WiFi and AM radio. AM is found on much lower frequencies, around 1Mhz. WiFi is on the opposite side of the spectrum at 2.4Ghz (2400Mhz) and 5Ghz (5000Mhz)
Antennas.
This is where it really gets tricky. Wavelengths of frequencies determine the size of the antenna. Most people make the mistake of thinking bigger antennas are better. This is not true, and can hurt in certain cases. The lower the frequency, the longer the wavelength. Longer wavelength means bigger antenna. 100Mhz is requires roughly a total of 4ft antenna, while 3MHz would require a combined 156Ft. antenna. Most antenna can operate at half the size, called a half wave-length antenna. There are several good antenna calculators online, such as at Dipole Antenna Calculator
Consider this, how much longer is your car radio antenna, than your cell phone antenna? Most people don’t even realize their cellphone has an antenna because it’s so small that it fits inside the phone. Most modern smartphones have the WiFi, Bluetooth, and Cellular Antennas literally in a circuit board as shown below.
Sometimes you will see much larger directional antennas, such as WiFi antennas, that claim to receive better reception or more WiFi networks. This is true, but only in the direction they are pointing. These yagi antennas have “directors” and “reflectors” which help to broadcast and receive radio frequencies from further distances, but the part of the antenna that is doing all the work is very small.
I could do an entire blog just on antennas and antenna theory, but for the purpose of this blog we’ll only talk about the basic antenna, a dipole. Dipole antennas have a positive and negative side, one for the wave going up, and one for the wave going down. Think old rabbit ear TV antennas. Most antennas are this same type, but turned sideways.
Dipole antenna picture from wikipedia
If you remove the rubber from a basic WiFi antenna, you will notice they do this by taking coax cable and exposing the inside of the wire. The inner part acts as one pole and the outer shielding acts as the other pole. It’s literally a stripped wire inside hard plastic to keep it upright.
The metal thing in the center of the wire is to keep it in place inside the plastic cover.
Why does this matter? Choosing an antenna can make a big difference depending on what your trying to do, but they are not as complicated as they appear. For beginners, I suggest using a set of rabbit ears. The last rabbit ear antenna I found at a yard-sale for $1. If nothing else, you can use a bare copper wire around 6” long, connected to the inner conductor of antenna output. but most cheap SDR devices come with a small antenna. Which brings us to the next section.
SDR USB Devices
Feb 17 2009 was the date that all over-the-air TV broadcasting (aka local TV stations) were required to switch from analog to digital. People who relied on local TV using an antenna would need a new TV with a digital tuner built in, or a separate digital tuner set-top-box to hook to their older TV. Manufacturers decided to also offer USB digital tuners which allowed digital TV to be received on a PC, because they were cheap to make. They were called DVB-T TV Tuner Dongles and generally use the RTL2832U chipset.
Hackers realized that by changing the drivers in Windows, the RTL2832U could be accessed directly with Software Defined Radio software, and were able to recieve way beyond the range of UHF TV frequencies. DVB-T dongles then became known as RTL-SDR within the hacker world and became somewhat popular because they be purchased for as little as $7. History on the subject can be found at https://www.rtl-sdr.com/about-rtl-sdr/
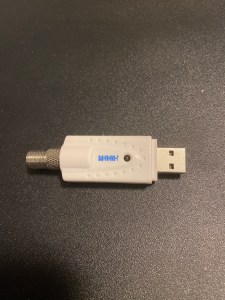
My first SDR Dongle. $8.99 on Newegg
Above is my first RTL-SDR Dongle. It’s a standard DVB-T USB dongle, and has a type-F coax connector. This is the standard connector for Cable TV and UHF TV antennas. It can pick up between 20Mhz-950Mhz. Newer RTL-SDR Dongles have a wider range, but are usually around $25.
What can it do? If you have ever used a police scanner, it’s like that on steroids. It can pick up FM radio, police, EMS, Fire, pagers, older baby monitors, taxis, some satellites, aircraft (positions and communication), weather radio, some CB stations and a lot more.
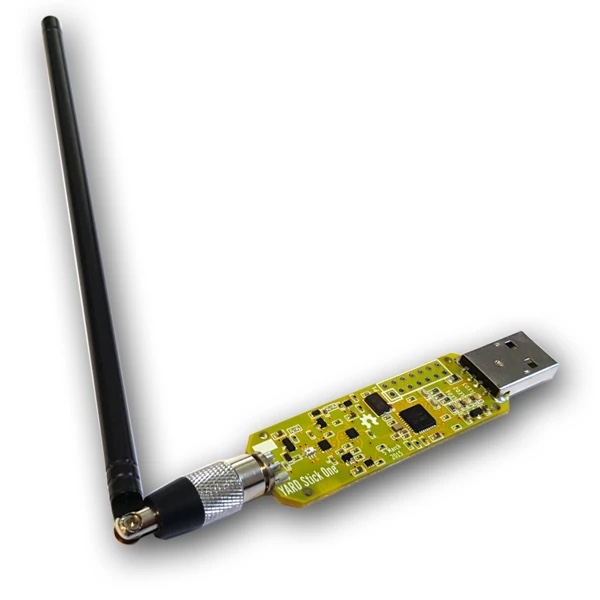
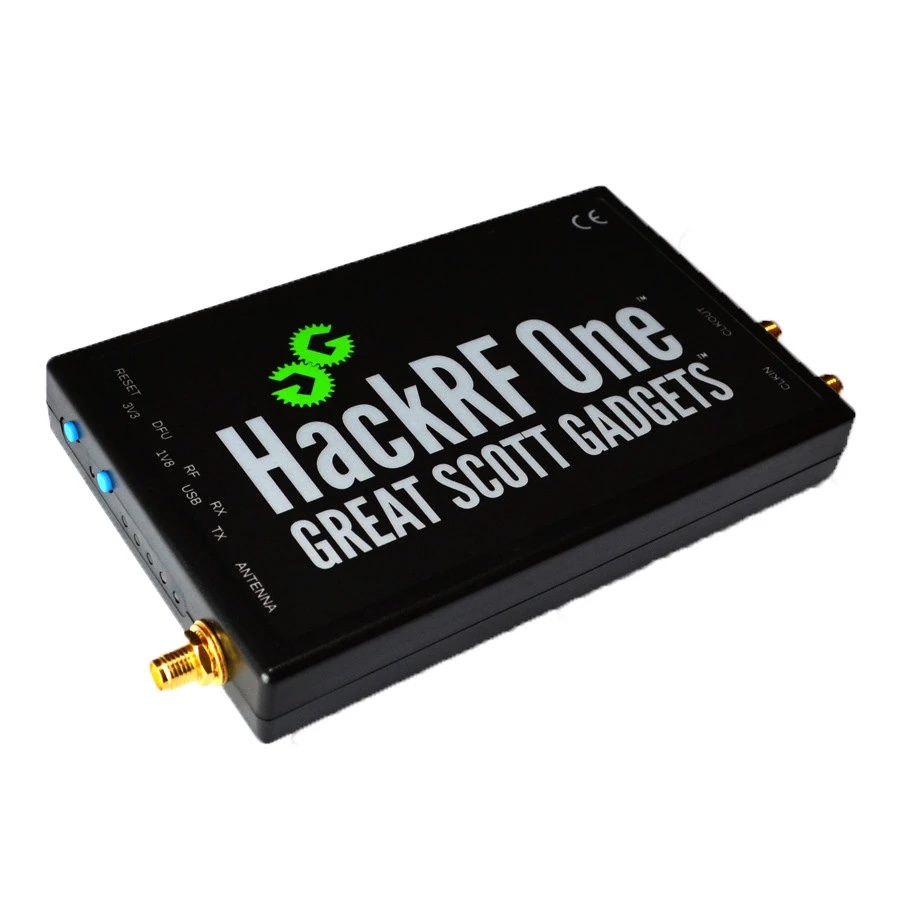
The next step up in devices would be a Yardstick One or HackRF. These get a are a bit more expensive but the HackRF has the ability to transmit. Be careful because this can be illegal depending on the frequency and range.
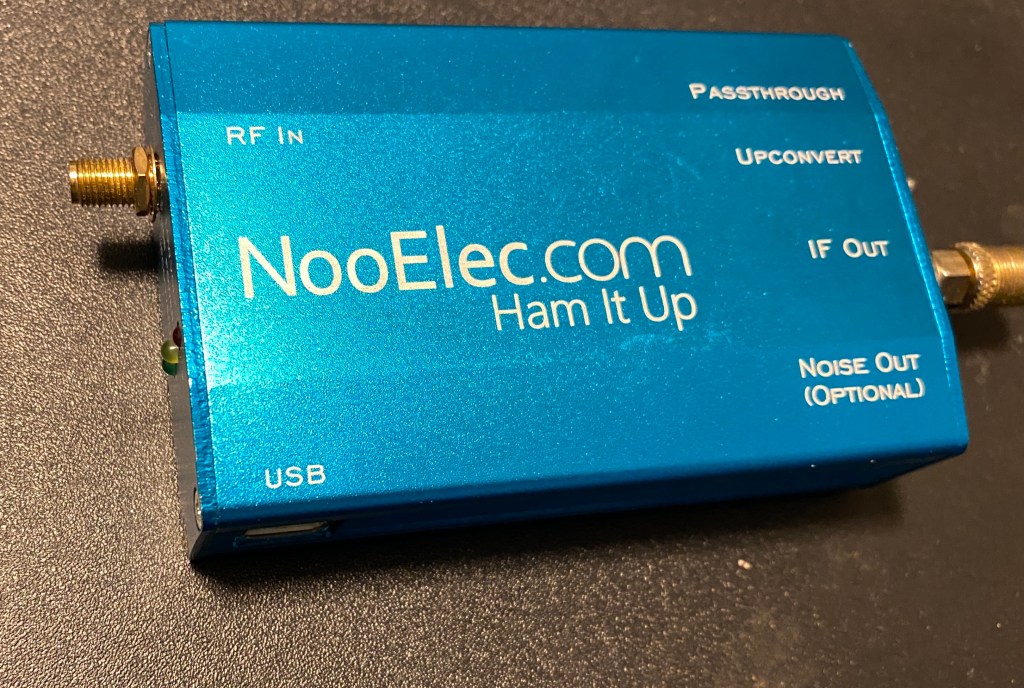
Other types of hardware to consider are Up-converters and down-converters. These devices can extend the frequency range of your SDR receiver, by taking lower or higher frequencies, and inputting them as a UHF frequency into the RTL-SDR. Below is a picture of my “Ham It Up” by NooElec. This is a USB powered up-converter that connects in line with your SDR dongle and drops the frequency range down to below 1Mhz and inputs it as 120Mhz
Ham It Up up-converter
Software
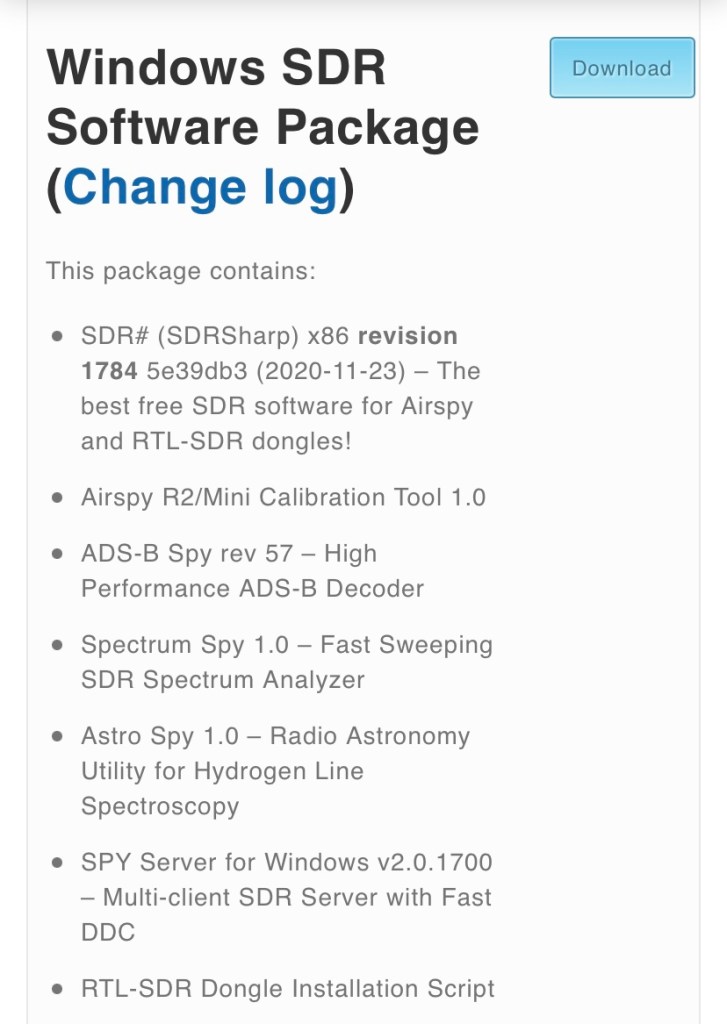
The software that I recommend starting out with is SDR# or SDRSharp for Windows. Look for the Download link beside Windows SDR Software Package at https://airspy.com
SDRSharp comes packaged with Zadig, a small app that changes the driver associated with your SDR dongle so that it will work with RTL-SDR software. If this doesn’t come with the package, or you find that your SDR doesn’t work in SDRSharp, then check the lower part of the same website for “WinUSB Compatibility Driver”.
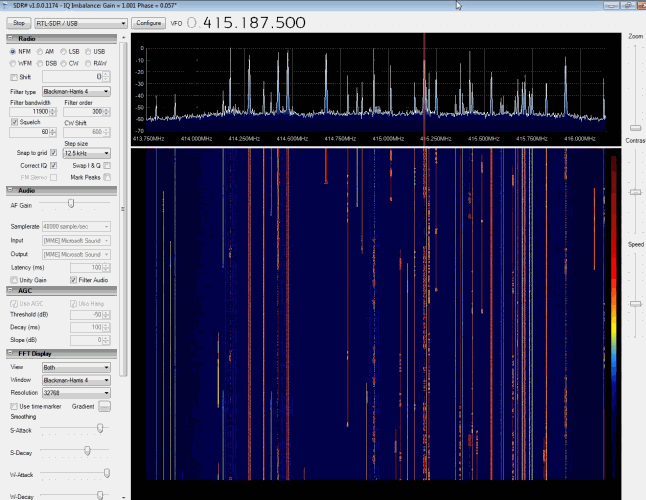
SDRSharp GUI
The nice thing about SDRSharp is that it gives a clean visual of the frequencies your looking at. It’s great for exploring what is going through the air in your area. Select RTL-SDR/USB from the drop down menu in the top left and click Start. Click Configure to tune the power on your SDR if desired. You can then drag the top right window right or left to select the frequency to monitor. The right also has a selection for NFM (narrow FM), WFM (Wide FM), AM, and others. Play with the section and try all three when you notice activity on a certain frequency. Your standard FM radio stations are going to be WFM, while other signals will usually be either NFM or AM. Most other options will be more useful on HF, which would require and up-converter. I highly suggest checking youtube for videos on how to use SDRSharp if your not familiar with SDR software. It can seem overwhelming at first, but only takes a few minutes to learn.
SDRSharp also has an option for up and down-converters, to show the actual frequency being searched, rather than the one it’s being converted to. It supports plugins for recording, noise control, and receiving and decoding digital voice.
They also include other SDR receivers for Linux, macOS, Rasbpian, Android, and web-apps
At the bottom of that site there is a section called “Programs Compatible Through Piping” . Many of these were created for other radio devices to decode digital signals using the microphone input on a PC. Search the web for “Virtual Audio Cable” (Windows only). This app creates virtual audio inputs and audio outputs, so that SDRSharp can be assigned to a virtual audio output, which will show up in other apps as an audio input, mimicking a microphone
Interesting apps to check are DSD+ which can decode digital police and other digital audio and data communications, and PDW which can decode data being sent to pagers.
Security
Much of what is broadcasted on RF is not encrypted. Encryption and Security are things that aren’t typically considered in the RF world, except for WiFi and LTE. Otherwise, little has changed with these communications since they were created.
Things that should consider better RF security includes garage door openers, keyfobs, cordless phones (yeah, they’re still around), baby monitors, and much more. You might be surprised at what you will find.
My purpose for writing this is to get people interested. I may add more specific posts on the subject at a later date. Below are some links to useful websites on the subject.